
The terminal of your office Mac, from anywhere
Six steps - Remote Login on the Mac, Awacino on your side, and your shell is ready.
No credit card needed · cancel anytime · secure checkout with Stripe
Terminal access, step by step
Switch it on once on the office Mac, then reach it from anywhere through Awacino - your usual remote desktop or terminal app, no VPN, no open port.
- Awacino and a secure shell app on your laptop or phone
- Awacino on the office Mac or on a device in its network
- A company account - every plan, also Company Free
- 1
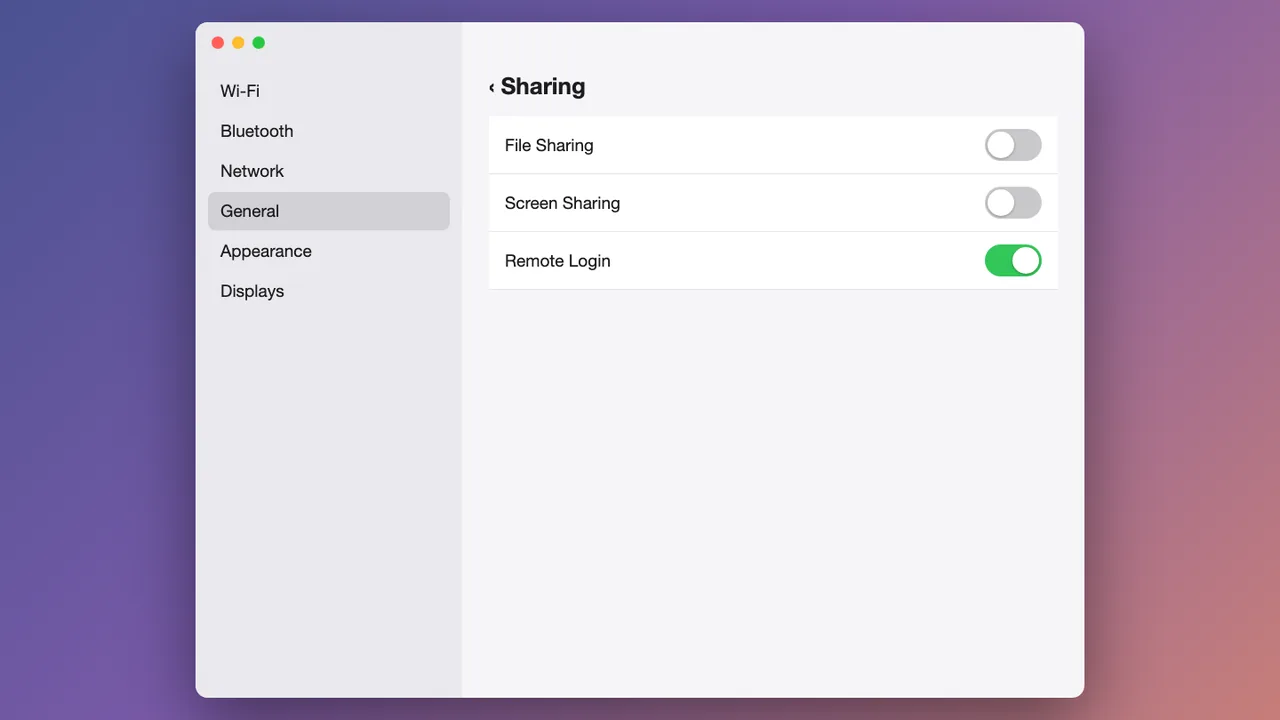
Turn on Remote Login
On the Mac open System Settings → General → Sharing and turn on Remote Login.
No port forwarding: the secure shell port stays closed to the internet - only devices beamed into the network reach it.
- 2
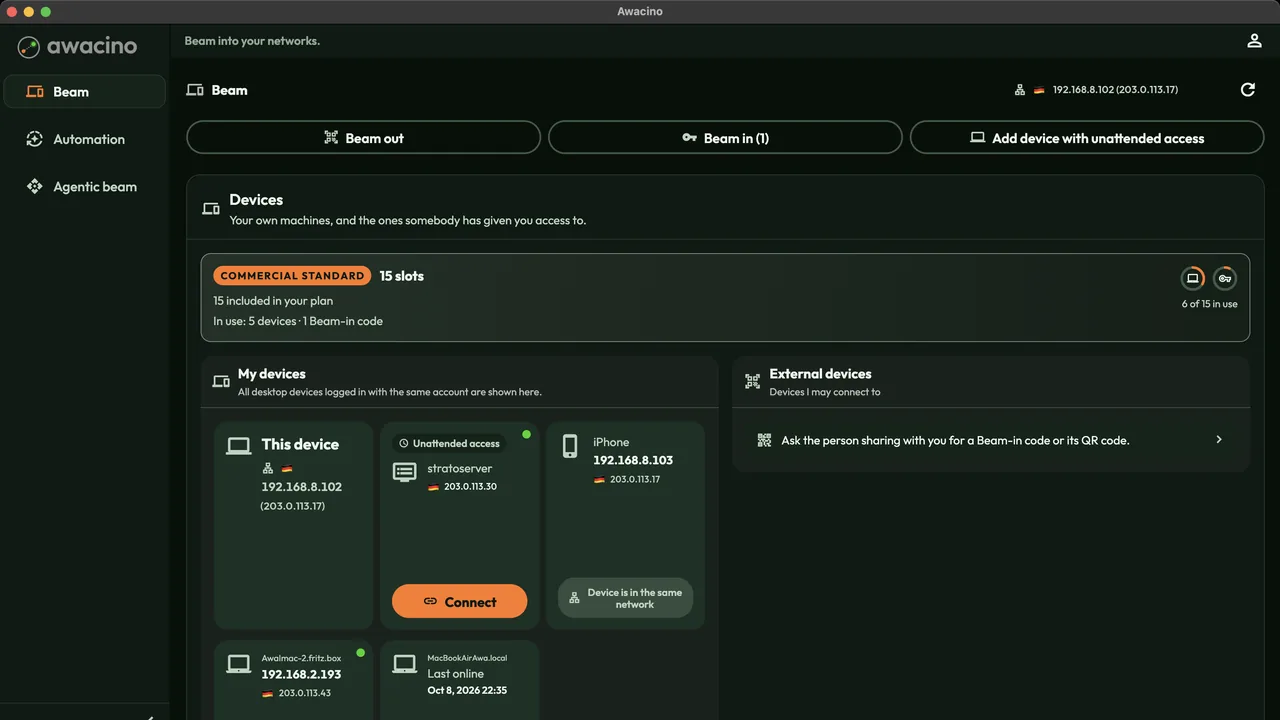
Connect to the office Mac in Awacino
On your laptop or phone, open Awacino. Under My devices you see every company device you may reach - tap Connect on the office Mac.
- 3
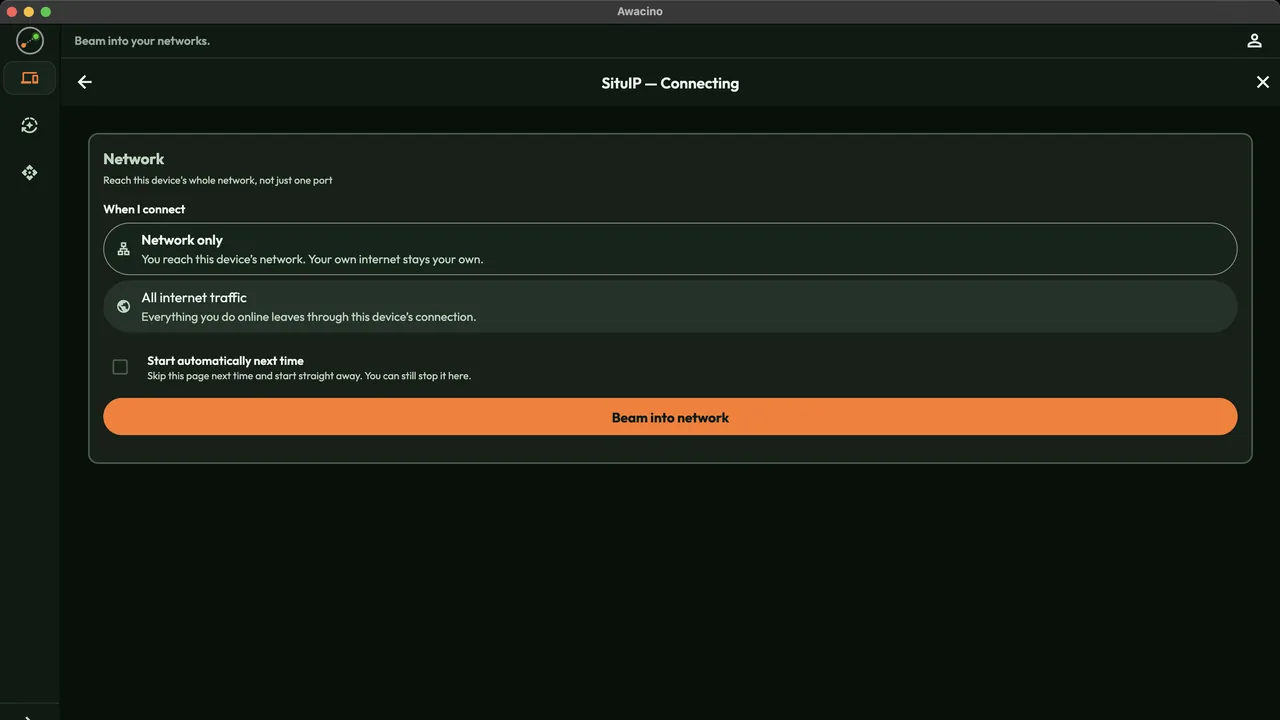
Beam into its network
Choose Network, leave Network only selected and tap Beam into network. Your own internet stays your own.
- 4
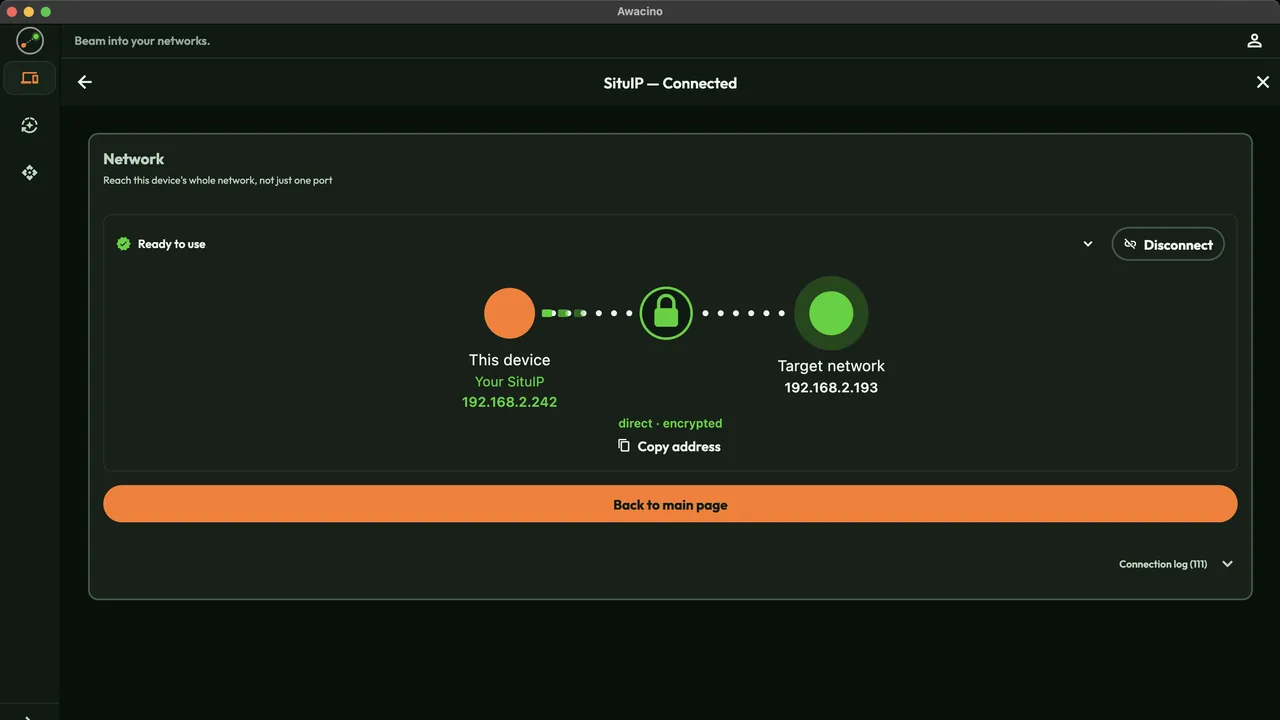
Copy the office Mac's address
In a few seconds Awacino shows Ready to use. Your device now has its own address in that network, its SituIP. Tap Copy address.
The connection is direct and end-to-end encrypted - no VPN gateway, no open port in the office.
- 5
Open your secure shell app
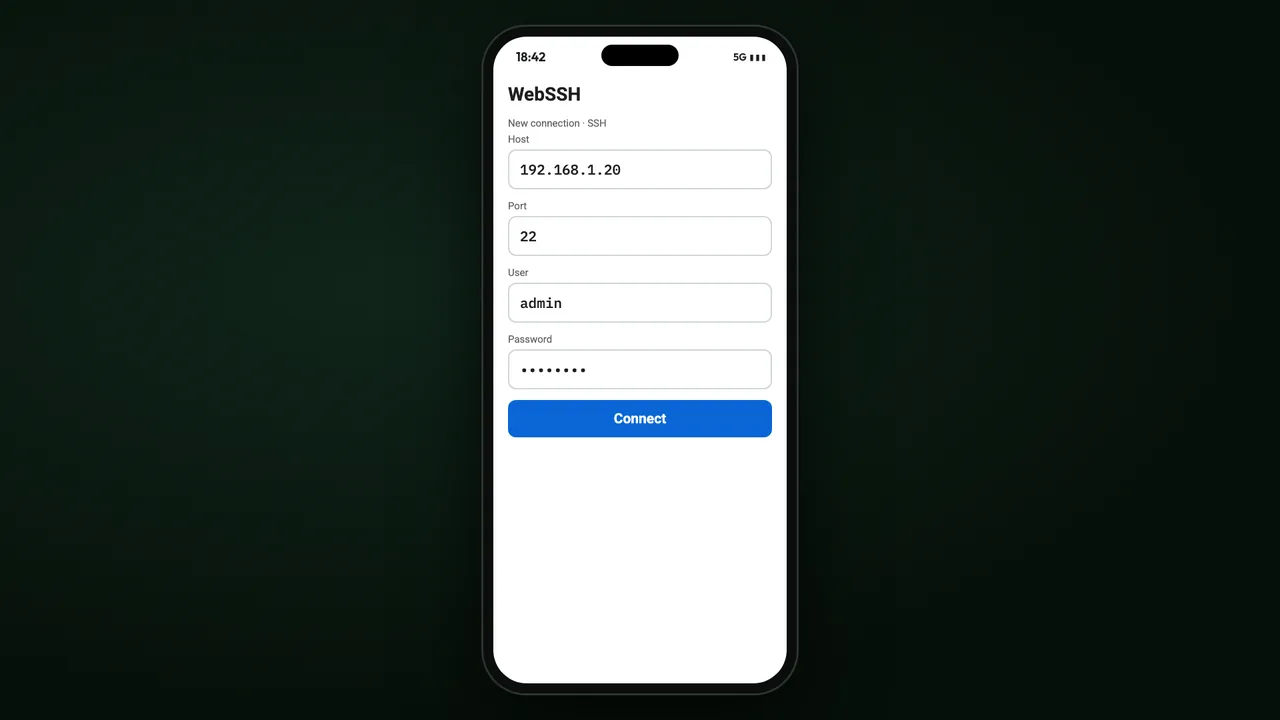
Open a secure shell app (for example WebSSH), paste the address, enter the Mac's user name and password, tap Connect.
- 6
Your terminal
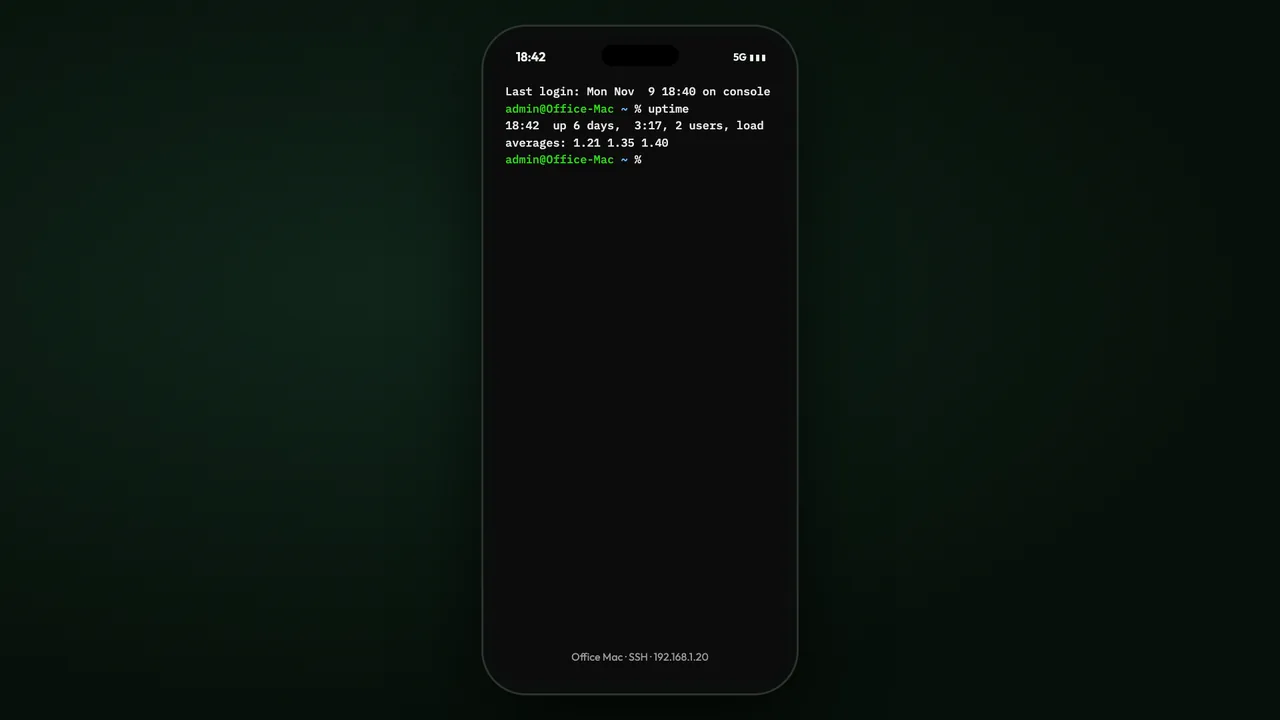
The Mac's terminal opens - run any command as on the Mac itself.
Reach every office computer from anywhere
Every company plan: 30 days free, no card. Or start on Company Free.
No credit card needed · cancel anytime · secure checkout with Stripe